
SD card is short for Secure Digital card. SD card can be divided into standard SD card, Micro SD card and Mini SD card by physical size, or divided into SD (less than 2GB), SDHC (2GB - up to 32GB), SDXC (more than 32GB and up to 2TB) and SDUC (more than 2TB and up to 128GB) by storage.
SD cards are widely used in home appliances such as digital cameras, mobile phones, game consoles and car navigation systems. For mobile devices, some Android phones and tablets support SD card as external storage. If you don't have enough space, you can quickly expand the capacity by using an SD card. You can also avoid the problem of running out of internal storage space on your device before you know it. Also, if you use the SD card reader together, you can conveniently remove it like a USB drive to save, transfer and share the data.
Saving music files is one of the most important uses of SD cards. If you are using Apple Music on Android device and your device supports SD card, do you want to save Apple Music songs on SD card or move the downloaded Apple Music songs from internal storage to SD card? In fact, moving songs from internal storage to SD card can quickly free up the internal storage of your Android device.
However, Apple Music songs on the SD card come with DRM protection, if you remove the SD card and insert it into other devices, the Apple Music songs inside will not be recognized by other devices. Also, Apple Music songs on the SD card can't be used as background music by video editing apps installed on your Android device. If you want to use them like using normal files, you need to convert Apple Music songs to MP3/M4A/WAV files with TuneKeep Audio Converter first.
- Table of contents
- 1. Change the Download Destination of Apple Music Songs to SD Card on Android
- 2. The Limitations of the Apple Music Songs on the SD Card
- 3. TuneKeep Audio Converter: Best Solution to Copy Apple Music Songs to SD Card
- 4. How to Convert Apple Music Songs to MP3/M4A/WAV Step by Step
- 5. How to Copy Converted Apple Music Songs to SD Card
Change the Download Destination of Apple Music Songs to SD Card on Android
As we all know, some Android devices support SD cards. However, it is also a fact that the number of devices that can support SD cards is decreasing in order to promote the sales of large-capacity smartphones in the recently released smartphones. Because, the price of the smartphones with larger storage is always higher and the phone companies can get more profit. Buying a SD card with large capacity is much cheaper than the price difference between two phones with different storage. Users who often download music and videos may run into problems with their internal storage being exhausted before they know it. For this reason, many Android users chose SD card compatible models when choosing a smartphone.
On Android phones and tablets that support SD cards, Apple Music songs downloaded from the Apple Music app can be transferred from the internal storage to the SD card. After transferring, the songs downloaded later will be also saved in SD card. Check the steps below.
Step 1: Open Apple Music app on your smart-phone and tap the menu icon > Settings.
Step 2: Tap on "Download Location" option and select "Yes" on the pop-up window to select SD card from the list.
Step 3: Accept the prompt when asked if you want to move all the downloaded tracks, along with any future ones to your SD card.
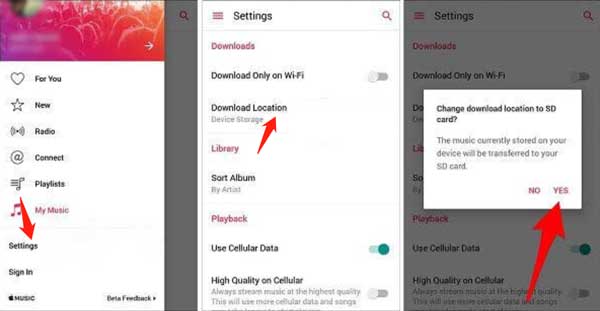
Okay, now all the downloaded Apple Music tracks have been moved to your SD card. This also frees up the internal storage of your Android device and makes your device more comfortable to use.
The Limitations of the Apple Music Songs on the SD Card
As we know, all Apple Music songs come with FairPlay DRM protection which prevents Apple Music songs from being played on other unauthorized devices. So the Apple Music songs on your SD card can be only enjoyed on this Android device because Apple Music songs are embedded with your Apple ID and device information.
This causes two results you may not want. First, if you remove the SD card and insert it into other device, no music player can recognize the Apple Music songs because of the protection. Second, any video editing apps, audio editing apps or DJ apps on your Android device cannot load the songs as background music or audio source.
Many users wonder that how they can copy Apple Music songs to SD card and use them with other devices and apps like using MP3/M4A/WAV without any restrictions.
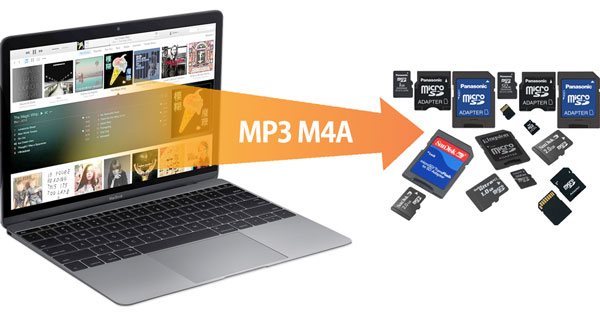
In fact, with the help of TuneKeep Audio Converter, saving Apple Music songs on SD card is just as easy as a breeze.
TuneKeep Audio Converter: Best Solution to Copy Apple Music Songs to SD Card
TuneKeep Audio Converter can remove the FairPlay DRM protection from Apple Music songs and convert them to unprotected MP3, M4A, WAV, AIFF or FLAC at 20X faster conversion speed with all music information kept. After conversion, you can freely copy the output files to SD card for different purposes.
Wonderful Features of TuneKeep Audio Converter
- Convert Apple Music songs, albums and playlists in bulk with only a few clicks
- Convert Apple Music to MP3, M4A, WAV, AIFF or FLAC depending on your need
- Convert the songs with a built-in web player without using iTunes or Music app
- Convert Apple Music songs to 320kbps MP3 or 256kbps M4A losslessly
- Enjoy 20X faster conversion speed on both Windows or macOS and save lots of time
- Keep ID3 tags like song title, album, artist, track number, artwork, etc.
- Rename output files by title, album, artist, track number, hyphen, space, etc.
- Sort output files into folders by album, artist, album/artist or artist/album
- Fully compatible with latest Windows and macOS (Intel & Apple silicon)
How to Convert Apple Music Songs to MP3/M4A Step by Step
TuneKeep Audio Converter can easily convert Apple Music songs, albums and playlists to MP3, M4A or WAV in only a few clicks. After converison, you can copy the output files to your SD card for different purposes. If necessary, check the steps below for your reference.
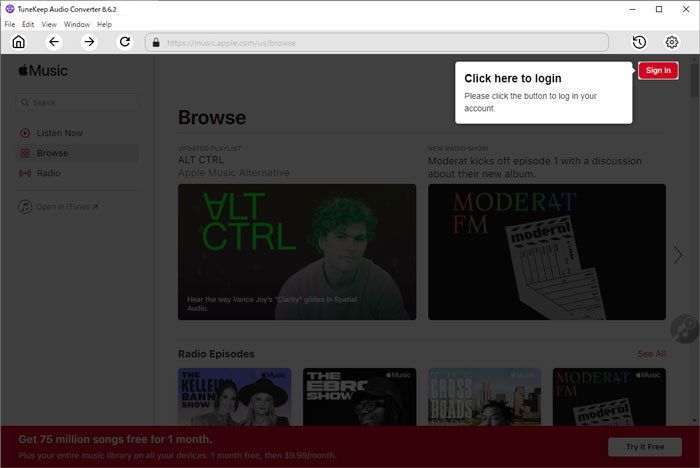
Step 1: Launch TuneKeep Audio Converter and Sign In
TuneKeep Audio Converter provides a built-in Apple Music web player, so launch this program and you will be asked to sign in your Apple ID. You can click "Sign In" button at the upper right corner to enter your Apple ID and password. You don't need to do this again if you don't sign out. Once you have signed in, you will see all your Apple Music playlists.
Step 2: Choose an Output Format
TuneKeep Audio Converter provides Auto option, M4A, MP3, WAV, FLAC and AIFF as output formats. The default output is Auto option which equals to 256kbps M4A. If M4A format is the right format for your SD card, you don't need to change the output format. However, if you want to save MP3, WAV or other audio-quality M4A files on your SD card, you need to change the ouptut format first. You can click Settings icon at the upper right corner to open Settings dialog and select your favorite format.

As you can see, you can also set output folder, choose a way to rename the output songs and sort them into folders. We also recommend that you choose to open the output folder after convesion because it helps you to locate the output files quickly.
Step 3: Add Your Favorite Album/Playlist to Conversion List
After you are satisfied with your settings, you can go back to the built-in Apple Music web player and start browsing, then open the detailed page of your favorite album or playlist. You will see a button in the middle right, hover your mouse on it and it will be changed to "Add to List" button. Click this button to add the album or the playlist to conversion list.
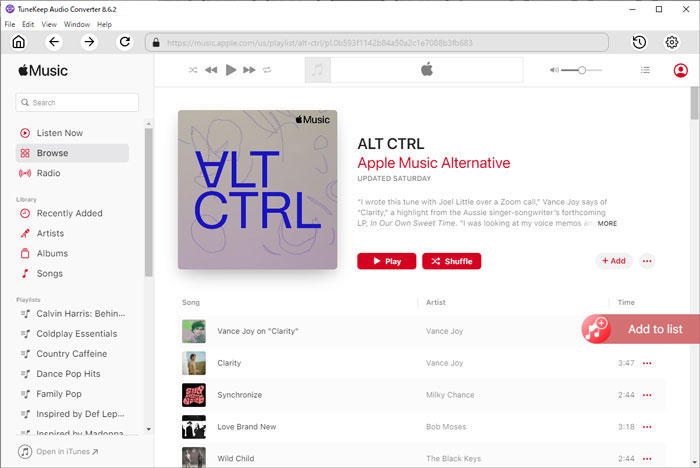
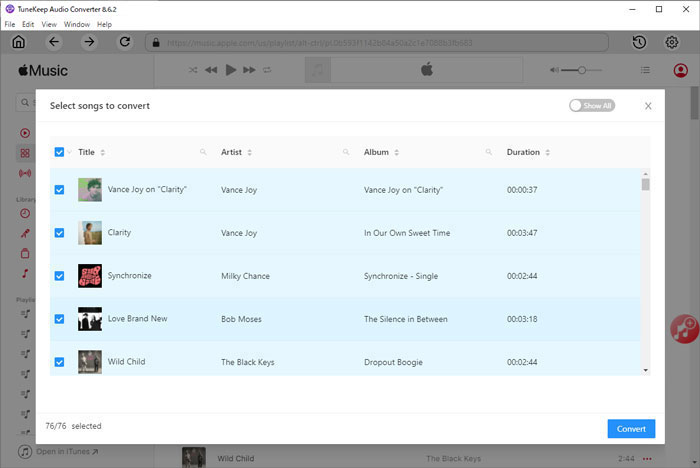
Step 4: Choose the Songs
All the songs in the album or in the playlist will be added to conversion list in checked status. If necessary, you can uncheck the songs if you don't want to convert them.
Step 5: Start Apple Music Conversion
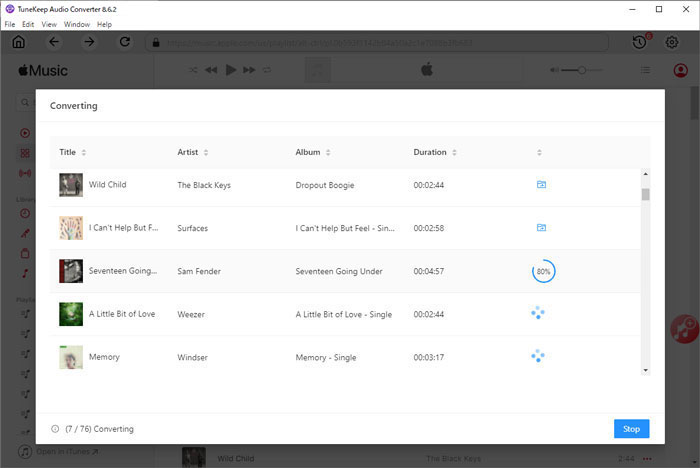
Now you are ready to go. You can simply click the "Convert" button to start converting the Apple Music songs. After conversion, the output folder will be opened if you have set "Open output folder" after conversion in step 2, otherwise you need to click the "History" button at the upper right corner to find the output files and open the output folder.
How to Copy Converted Apple Music Songs to SD Card
Before you can start copying the output music files to your SD card, you may need to pay attentions to following items.
- File System: Your SD card should be formatted into FAT32, EXT4, EXT3 or exFAT file system for Android device. Make sure your destination device accept these file systems.
- Music Folder: Some devices can only play songs in Music folder. If your device is this case, you can create a Music folder first.
After your SD card is ready, you also need to check whether your computer comes with a SD card slot. Whether there is a SD card slot decides how to copy the converted Apple Music songs to SD card.
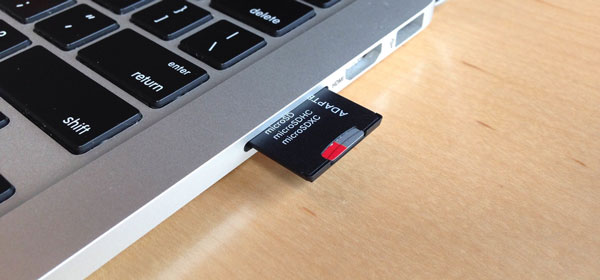
On computers with SD Card Slot
If your computer comes with a SD card slot, you can directly insert the SD card to the slot. The SD card will be displayed as a removal USB drive. Now you can simply copy the output files to the SD card.
On computers without SD Card Slot
If there is no SD card slot on your computer, you need to prepare a SD card reader in advance. Insert the SD card into the reader and plug in the reader to the USB port on the computer. Then the SD card should be displayed as a removable storage device and you can start copying the converted Apple Music songs.
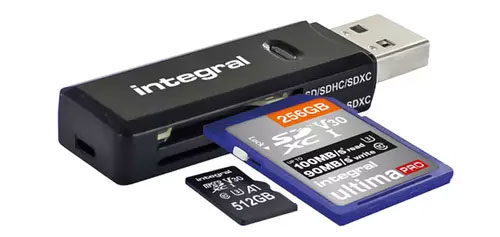
On some Macbooks, you may need to prepare a USB adapter in advance if there is no USB port.
Bottom line
Saving music on SD card is one of the most important uses of SD card, but because Apple Music is a streaming music service, the downloaded songs are also encrypted, many users give up the idea of saving Apple Music on SD card. However, with the help of TuneKeep Audio Converter, saving Apple Music on SD card will become very simple, and these converted music can be easily shared and played on different devices.
If you are an Apple Music subscriber and use SD card a lot, please do not hesitate to download TuneKeep Audio Converter to have a try!