You are allowed to use free trial version of TuneKeep M4V Converter for Mac to convert the first 5 minutes of each M4V video. If you need and want to use the full version and get free updates for lifetime, you can purchase the license key and register the program. In fact, You can use Mac free trial version for 45 days. Before all that, you can now learn how to register the full version and how to use the converter in the following guides.
※ We are so sorry that TuneKeep M4V Converter does not support macs 10.13 High Sierra and higher.
How to register the full version of TuneKeep M4V Converter (Windows)?
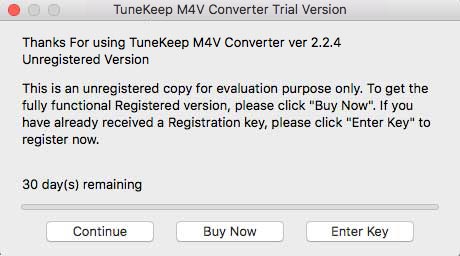
A notice dialog will pop up when you launch TuneKeep M4V Converter (Mac) without registration. In general, it is telling you that you are using a unregistered copy which only for evaluation purpose and you can choose to register the program or buy a license key. If you already have a license key , just click "Enter Key" button to enter it.
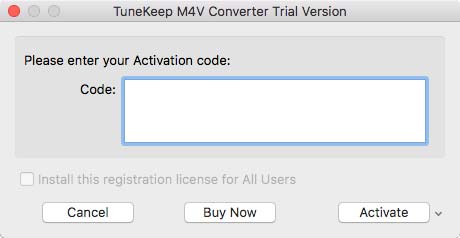
There will be another dialog with the words " Please enter your activation code" popping up, just copy the license key you have and paste it in the blank , then click "Activate" button to get the full version. Please make sure Internet services is available, because it's necessary for verifying the license key.
Note:If you failed to register TuneKeep tunes M4V Converter (Mac) Online, please contact our support team through [email protected]. You can get the offline registration method.
Detailed but simple user guide of TuneKeep M4V Converter (Mac)
Although TuneKeep M4V Converter (Mac) is an simple and easy0to-use converter, you may need this detailed user guide to help you use the converter to convert iTunes purchased movies, TV shows, etc. to usual MP4 files more fluently and quickly.
Step 1: Launch TuneKeep M4V Converter (Mac)
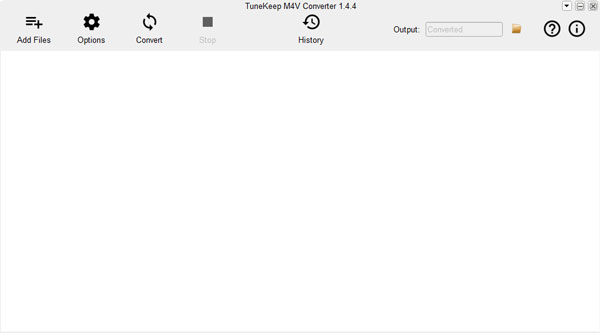
There are two different situations between using 12.7 or higher version of iTunes and older version of iTunes to launch TuneKeep M4V Converter. The program can actually work individually if you are using 12.7 or higher version of iTunes. Conversely, if you are using an older version of iTunes, it will be automatically launched with the converter. Please note that if you are the latter, you will need to close iTunes at first if it is running.
Step 2: Add M4V Videos to Converter
You need to click "Add Files" button first and you will find all the your purchased iTunes M4V videos including Movies, TV shows and music videos are listed as playlists one by one in the left panel.
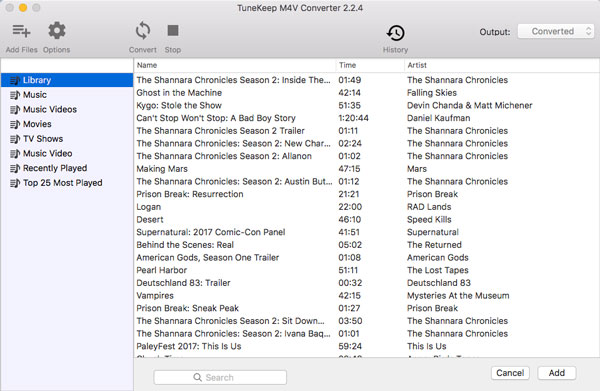
Select the videos you want to convert to MP4. You can use Command or Shift key to add multiple videos at once. There are three add modes for you to choose how to add the videos to the conversion list.
1. Add the selected videos to conversion list - please click "Add" button.
2.Add the whole playlist to conversion list - please click "Add All" button.
3. Add M4V videos which are listed in different playlists - please click "Add Files" button multiple times.
If it's too hard to add an specific M4V file, you can use the built-in search box to locate it anytime.
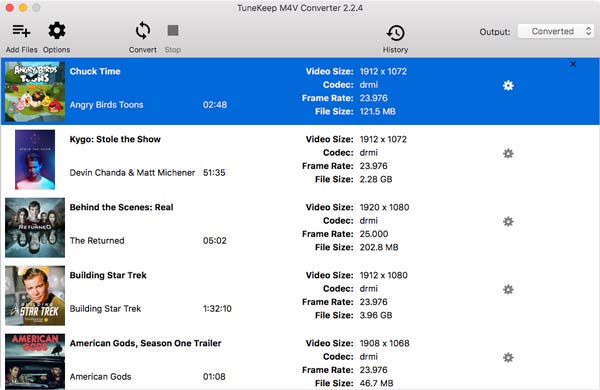
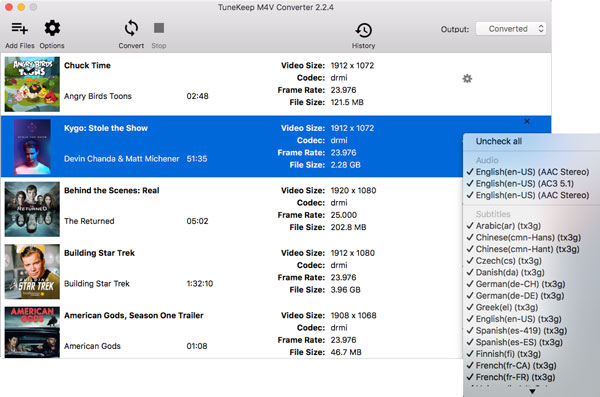
Step 3:Select Subtitles & Audio Tracks
Because different users have different needs, M4V Converter for Mac allows users to reserve every multilingual subtitles, audio tracks (including Dolby 5.1), closed captioning and audio descriptions after conversion, and generally speaking, the converter will reserve them by default, so you don't need to make any changes if you want to keep them all. But if there are some tracks and subtitles that you want to remove or just have no needs to have them reserved, you can simply click the little settings button to uncheck them.
You can find the output files in the following default output folder: /Users/(Your username)/Documents/TuneKeep M4V Converter/Converted if you did not change the output path before conversion. Of course, if needed, you can click "Options" button to change the default output folder to a specific one.

Step 4:Start Converting M4V to MP4
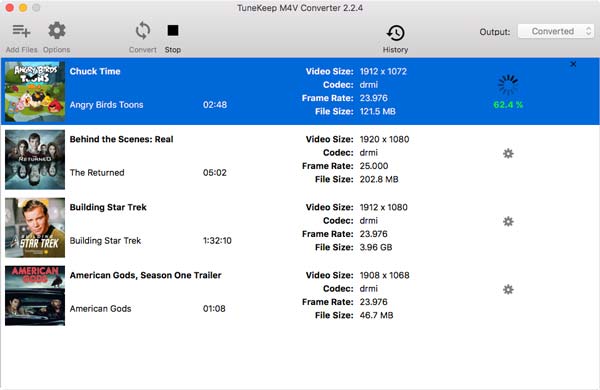
Congratulations, now the conversion is finally ready. Simply click Convert button to start the conversion of iTunes M4V videos to MP4. Generally, the conversion comes with a 30X faster speed on M4V Converter for Mac. You will soon get the output MP4 files if you use a latest Mac, and you may need a little bit longer to wait for the output result because the conversion speed also depends on your hardware configuration.
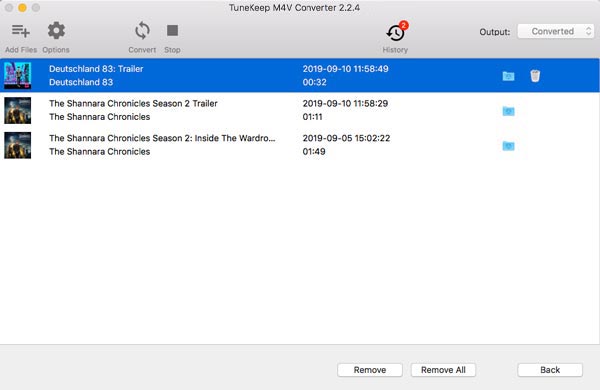
Click History button to open the History panel. In this window, you are allowed to see all the converted files, open output folder and delete conversion record or converted output files.
Now all the steps are finished, you can copy or sync the output MP4 videos to any other devices, enjoy it!